Labels

Saturday, February 25, 2012

Homemade Coffee Creamer

Holy moly, I am so excited about this post.
Don't you just LOVE your morning coffee?
Do you have a favorite coffee creamer?
Have you ever read the ingredient list on your creamer?
If you look, you'll find things like palm oil, sugar, corn syrup, dipotassium phosphate, salt, partially hydrogenated soybean oil, sodium castenate, artifical color & flavor......
Do I really need to go on?
It's called coffee creamer, but it usually a non dairy product full of nasty oils, flavors & sweeteners. It's pure junk!!

This all came about because I weaned myself off of the "junk" and resorted to a splash of milk or black coffee.  Well, this doesn't work for Greg because he likes the flavored stuff, so I started buying "Natural Bliss" by Coffee-mate.  It doesn't have any of the nasty stuff in it, it's simply cream, sugar & flavor.....BUT it has full fat cream and "natural flavoring" that tastes really fake.
After reading the ingredient list on the "Natural Bliss", I was like...."why the heck don't I just make it myself, it seems pretty dang easy."  So I did it and OH MY!  It's amazing.
My goal for making my own creamer was to have it taste great, not all artificial-ly AND to have it be low fat.  It was a complete success.


For my milk product, I used ultra-pasteurized 2% milk.  You can find this at most grocery stores and the benefit to this, is that it lasts longer without going bad.  Ultra-pasteurized simply means that it was heated to a higher temperature than most milk is to ensure that ALL the bacteria is killed.  The expiration date on ultra pasteurized usually goes out at least a month.  I thought this would be best, in case I didn't use the creamer quickly, it would have a longer life.
For example, I bought milk today 2/24 and it expires on 3/26.
(If you have a problem with dairy, feel free to sub in your "milk" product, rice/almond/soy/etc).


Please use GOOD vanilla!  No imitation!  Trust me!  You can't imitate good vanilla.


Here's the simple recipe:

2 cups ultra-pasteurized 2% milk
2 tablespoons honey
1.5 teaspoons vanilla (ONLY THE GOOD STUFF! NO ARTIFICIAL/IMITATION!)

Bring milk & honey to a simmer over medium heat, stirring occasionally.  Once it comes to a simmer, remove from heat and add vanilla.  Cool and pour into a refrigerator-friendly container.  My favorite is a mason jar.  Enjoy with your coffee.

NUTRITION FACTS: 
Serving Size: 2 tablespoons
Calories 10
Fat 0.3 g
Cholesterol 1.2 mg
Sodium 6.3 mg
Carbs 1.3 g
Protein 0.5 g

If you want your creamer to be creamier, sub half of the milk for half & half for only an additional  6 calories and 0.5 gram of fat.

Here's the comparable nutrition info for "CoffeeMate French Vanilla"
Serving Size 2 tablespoons
Calories 80
Fat 4 g
Carbs 10 g
(The fat-free version has the same # of calories/carbs)

Looks like all that crap they put in there to imitate milk, didn't work out so well.


Finally, the comparable nutrition for "CoffeeMate Natural Bliss Vanilla"
Serving Size 2 tablespoons
Calories 70
Fat 3 g
Carbs 5 g


If you want a creamier recipe with a little more flavor, check this one out--> Vanilla Spice Coffee Creamer
Whatever floats your boat....


Thursday, February 23, 2012

Freezer Oreo Cheesecakes

AND.....It's time for a naughty recipe!  I thought this day would never come.  Posting healthy recipes is fun and all, but the desserts just hold a special place in my heart.  
So I'm sure many of you have seen these mini-cheesecakes on Pinterest.  That's where I got the idea to make them.
Originally, I simply followed the recipe and thought they turned out great!  Then Greg, the genius he is, said, "I think we should put them in the freezer!" 
AND the lightbulb went off.
Brilliant!


Here we go.
This recipe makes about 16 mini cheesecakes. 
Put liners in a muffin pan and simply place an Oreo in the bottom of each liner.


Now the filling.  Can you really go wrong with cream cheese, sugar, vanilla, eggs, & sour cream?
First, beat the softened cream cheese until smooth.
Next, add in the sugar & vanilla until smooth.
Finally, beat in eggs.
Lastly, combine sour cream until silky smooth.


Stir in chopped cookies.


Spoon filling into cookie-lined muffin tins and bake @ 300* for 20-25 minutes or until filling it set (AKA it doesn't jiggle when you shake the muffin pan!)

Cool completely and place in freezer from 8+ hours (or overnight) until firm.


CONSUMER WARNING: Having these scrumptious morsels in your freezer can seriously test your self control.
RECOMMENDATION: Treat your favorite friends & family to their own individual cheesecakes, in order to spare your own backside a few pounds. :)


Nom. Nom. Nom.

Of course, you could just refrigerate these, but the texture of these when they are frozen is absolutely brilliant.  Trust me.

Freezer Oreo Cheesecakes
(makes about 16 servings)

22-25 Oreos (16 left whole for "crust", and coarsely chop remaining cookies for filling, about 1 cup)
1 pound (2, {8oz.} bricks) of light cream cheese, softened
1/2 c. sugar
1 tsp. vanilla
2 eggs
1/2 c. light sour cream

Preheat oven to 300*.  Put liners in a muffin pan and simply place an Oreo in the bottom of each liner.  Beat cream cheese until smooth.  Gradually beat in sugar & vanilla.  Add eggs, beating to combine.  Lastly, beat in sour cream and stir in chopped cookies by hand.
Fill cookie-lined muffin cups with prepared filling.
Bake about 20-25 minutes or until filling is set.
Cool completely and place in freezer for 8+ hours or overnight.
Enjoy.

(Feel free to double the recipe if you are making these for a crowd, because they will be wildly popular)


Tuesday, February 21, 2012

Hummus

Since I AM a dietitian, I have decided that I must post at least 2 healthy posts to each of my naughty posts.  I was going to share an awesome chocolate chip cookie recipe with you guys, but that will have to wait until later in the week.  Today we are going to make homemade Hummus.
Making your own hummus is SO much more economic and tasty than the pre-made stuff from the store.  Plus, it's free of preservatives because there's no way it's going to last that long once you whip up a batch.
I seriously recommend using a food processor, something that I am not blessed with in the trailer.  As many of you know, I chose to take my blender with me over my food processor because I thought it had more uses.  I wish I had more storage space in here because I would bring my food processor and my Kitchenaide stand mixer.  Oh how I miss those two lovely gadgets in my life.
Ok, so back to the hummus.  Use a food processor if you can, but a blender (mixer or potato smasher) works pretty good.

Start by rinsing those garbanzo beans really, really well until the water runs clear, with no bubbles.  This helps reduce sodium content AND reduces some of those "gases" we associate with beans :)  Both things that most people are trying to reduce in their lives! 


Roughly chop some gaaaarlic. (that's my Boston accent coming through, haah!)


TAHINI, my friends, is the secret to good hummus.  It's pretty much like peanut butter, except it's made out of sesame seeds instead of peanuts.  You usually find it in the grocery store next to the peanut butters.
It's all natural, with no hydrogenated oils, so the oil will settle on the top.  Give it a good stir and store it in the fridge once you open it.
I always store my natural nut butters, Adam's peanut butter & tahini, upside down in the fridge.  That way the oil is on the bottom of the jar and I don't spill it all over when I try to mix it up.  Just another little "trick of the trade"


Combine beans, tahini, seasoning, oil, water and lemon juice in your blender or food processor; pulse until smooth.  You will obtain a much smoother consistency in a food processor.  Add more water if necessary.

Serve with fresh veggies, pita chips, or put on your favorite sandwich or wrap.
Hummus is a great source of protein, fiber, iron, plenty of B-vitamins and minerals.


You could also add a flavor punch to your hummus by adding sun-dried tomatoes, pesto, roasted garlic, etc. etc. etc.
Enjoy this lovely snack, guilt free!

Hummus

1 (14 oz. can) garbanzo beans (AKA chickpeas)
2-3 tablespoons tahini
2 cloves garlic, roughly chopped
2 tablespoons lemon juice
1/4 teaspoon cumin, or more to taste
2 teaspoons olive oil
2-3 tablespoons of water, (or more to achieve desired consistency)
salt to taste

Rinse beans well.  Combine all ingredients in food processor/blender and pulse to combine.  Continue to pulse, adding more water if needed, until desired consistency is achieved.
Garnich with fresh herbs (cilantro, basil, etc).
Serve with veggies, chips or use as a condiment on sandwiches/wraps.
Can be stored in the fridge for about a week.


Thursday, February 16, 2012

Whole Wheat Bread Crumbs

You know those last few slices of bread in the bag? 
Uh-huh. 
You know how those slices are usually dried out?
Oh yeah.
Do you ever throw out those last few slices?
Sometimes.
Have you ever read the ingredient list on breadcrumbs?
Probably not, but it's long.  There's lots of salt and crap in there.

And how does this all tie together?  
By making your own bread crumbs, you use the whole loaf of bread, you simplify the ingredients, lower the sodium AND it saves a bunch of moo-lah.
Not only does making your own breadcrumbs do all of the above, but you are also able to make whole wheat bread crumbs, which are really hard to find at the store.  We should all be making an effort to switch our refined white grains to whole grains. This is just another way to reduce the refined crap in our diet. 
SO let's do it.


You have two options to dry out the bread:
(1) Take those last 3-4 slices of whole wheat bread out of the bag and set them out on the counter for a couple days until they are hard and crunchy (this is what I do).
OR
(2) Place bread on a cookie sheet in a 250*-300* oven for 20-30 minutes, or until it's all dried out.


Break up your hard bread into chunks and place in a food processor. In my case, I only have a blender since I have limited storage space in the trailer and no room for my beloved food processor.  A food processor would work best though.
The only *must*, is to make sure your blender or processor is completely dry, or instead of crumb you will get nasty sludge.


Pulse until bread crumbs form.  It's your choice whether you want a fine crumb or a heavier crumb!  That's the beauty of making your own! It's your choice.
Ahhh, the power of choice.  I'm pro-choice :)
3-4 slices of bread make about 1 cup of crumbs.  You can leave them plain or......

If you want seasoned breadcrumbs, feel free to add seasonings.
To one cup of crumbs, I added 1/2 tsp garlic powder and 1 1/2 tsp italian seasoning.
Give it a good stir.


Whole wheat bread crumbs, it's as easy as 1-2-3!!
I made chicken nuggets with these the other night and they were tasty and healthy!
They would be good for chicken parmesan, pan-fried fish, and endless casserole dishes.


For best results store in a airtight container, of course my favorite container is a mason jar.


There's really no specific recipe here.  Feel free to add any of your favorite seasonings, or leave them plain and add the seasoning when you use them each time.  If you leave them plain, you can season them appropriately for whatever you might be cooking.
Have fun, save money and stop wasting :)  Happy crumbing my friends.

Monday, February 13, 2012

Sugar Cookies for your Valentine

My dearest friend Kay Cee and I called these cookies "THE cookies" because once you've had them, there really isn't ANY cookie that is better.  If you like your sugar cookies soft and chewy, then this is the recipe for you.  


The first time Kay Cee made these cookies, I'm pretty sure I gained 5 pounds in like 2 days, but it was SO worth every ounce.  "THE" cookies are usually made for Christmas, but I decided to make them for my sweet lineman for Valentine's Day this year.   Kay Cee and I are also going to make these cookies for my wedding in August.  That's how good they are, they are wedding worthy.  Seriously.


"THE" cookies also remind me of a little roadtrip I took with Kay Cee and her hubby, Sean. We went to the airport to pick up my sweet lineman, and it was a happy memory where we all ate cookies in the truck, enjoyed the winter scenery, and simply chatted like only old friends can do.  Then we went out to a nice Italian restaurant.  Every time I think of "THE" cookies, I always think of that day and it makes me smile.  Those were my pre-trailer trash days, when Greg and I only got to see each other every couple months.


Valentine's Day is also kind of special for Greg and I because we consider it our "Anniversary" ..... because neither of us can actually remember when we became a real "couple", it was sometime during the winter and Valentine's Day was easy to remember, that's how we decided on that!
Happy 6 Year Anniversary Greg!


I also decided that when I post cookie recipes, I am only going to post pics of the finished product.  All cookie recipes are generally the same, how many pictures of creamed butter and sugar can a person really look at?  I hope you don't mind!
PS. Just try to practice self control :)


Frosted Sugar Cookies

2 cups butter, softened
1 & 3/4 cups sugar
5 eggs
3 tsp. vanilla
5 tsp. baking powder
7 cups flour


Preheat oven to 350*. Cream butter & sugar until smooth.  Add eggs & vanilla, beat until well combined.  Add baking powder and flour, 1 cup at a time until a soft dough forms.
Pour dough out onto a floured surface and roll out to 1/4" thick.  Use your favorite cookie cutter depending on the holiday.  Bake 8-10 minutes. (Cookies don't brown much, they will be light in color)
Allow to cool completely and frost with Cream Cheese Frosting.

Cream Cheese Frosting

1 (8oz) package of cream cheese, softened
1/4 cup butter, softened
2-3 tsp. milk
1 tsp. vanilla
4 cups powdered sugar

Beat cream cheese, butter, milk & vanilla until smooth.  Add powdered sugar 1 cup at time.  Use to frost your favorite cookies or cakes.


Monday, February 6, 2012

Beer Bread

I bought some pumpkin beer thinking it would be delicious....
And it was gross.
No one would touch it.  Even at a tailgate party.
How often does that happen?
So now I'm stuck with a 6 pack of nasty beer.  I can't waste it, so I figured I better make something tasty out of it.  Then I came across this recipe from gimme some oven blog, and decided Beer Bread was the perfect solution to my foul beer dilemma.
Now, I know that I totally fudged this one up, by not posting it before Super Bowl, BUT I was hoping that you all would forgive me?  I was enjoying the Arizona sun this past weekend, so I didn't make any football game blog posts.  ;)

This bread is best when it's fresh and warm, so I would suggest making it when you are having a few people over....plus, you don't want to be left alone with the leftovers.  You might just munch them all up!

What you need is the usual suspects for bread making, except the yeast, that's where your beer comes in.  It acts as your yeast. Even my nasty pumpkin beer was good in this recipe.

Mix your dry ingredients in a large bowl.  Pop some honey in the microwave to liquify.  Add honey and beer to the dry ingredients.


Stir beer/honey into dry ingredients just until mixed. Don't over stir.


Place batter into a greased loaf pan and brush the top with melted butter! (Don't tell anyone that an RD told you to do that, haha)


Bake @ 350* for 50-60 minutes or until a toothpick inserted in the middle comes out clean.


Enjoy this while still warm with some honey butter or jam!!!  MY Oh MY!!!

I want to keep playing around with this recipe by trying different beers. Think Porter, Amber, maybe an IPA or Hef..... Let me know if you find one that is delicious! 
You're Welcome :) D

Beer Bread (adapted from gimme some oven)
  • 3 cups all-purpose flour
  • 2 Tbsp. sugar
  • 1 Tbsp. baking powder
  • 1 tsp. salt
  • 2 Tbsp. honey 
  • 1 bottle (12 ounces) beer
  • 2 tbsp butter, melted
Preheat the oven to 350 degrees F. Grease a 9″ x 5″ x 3″ inch loaf pan.
In a medium bowl, whisk together the flour, sugar, baking powder and salt.  Put honey in microwave for a 10-20 second to liquify.  Using a wooden spoon, stir the beer and honey into the dry ingredients until just mixed. 
Pour batter into pan, and brush top with melted butter.
Bake for 50 to 60 minutes, until top is golden brown and a toothpick/knife inserted in the middle comes out clean. Bread is best warm with honey & butter!

Wednesday, February 1, 2012

Classic Risotto

Risotto is one of my favorite dishes.  It's so rich and velvety that you would think there was an absurd amount of heavy cream in it....but it's your lucky day, there's no fattening cream in sight.  The thing about risotto is that it needs to be cooked slowly to releases the starches from the rice.  This is where that creamy goodness comes from. Yep, the starch.  
This recipe is the classic version, except for the optional kale that I added at the very end.  I just felt like I wanted some extra greens, since I was having this as my main dinner dish.  Feel free to leave the kale out for an authentic risotto. If you're feeding a big family or want some divine leftovers, double the recipe!


Be sure to use arborio rice (AKA short grain, risotto).  If you don't want to use wine, feel free to simply use more chicken broth.  You probably don't see the normal can or carton of chicken broth in the pic below, because I use something else.  
See that yellow jar with the green lid?  That's Chicken flavored bouillon that you mix with boiling water to make chicken broth.  I use this for 2 reasons: (1) I takes up WAY less space in my tiny trailer pantry and (2) I mix it with WAY more water than it says in order to decrease the sodium content.


Bring your chicken broth to a boil. Once it boils, reduce to a low simmer to keep the broth hot.


While the broth is coming to a boil, prep everything (chop veggies, grate cheese, measure rice, etc).  Chefs call this "mise en place," which means that everything in place and ready to roll.


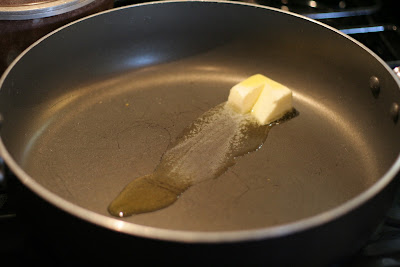
Heat your butter and olive oil in a large skillet over medium heat.  Saute onions until translucent, about 8 minutes.


Add mushrooms and garlic.  Cook until mushroom until tender and juice evaporate, about 5 minutes.


Add rice and allow it to toast for a few minutes.


Add the vino and allow it to fully reduce/ absorb in to the rice, about 2 more minutes.


Now dip a measuring cup into your hot broth and add about 1 cup of broth to the pan.  Simmer over medium-low heat until all the liquid is absorbed.  Repeat this process until all of the broth is used up


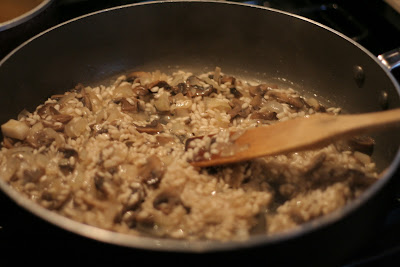
It's getting close...but not quite that creamy perfection I'm looking for.  Just take your time and allow each cup of broth to absorb, repeat.  Have a glass of wine and relax while the magic happens.


Almost there, it's getting creamy!


Ok, I used up all the broth.  Before the liquid fully absorbs, add peas.


**OPTIONAL If you're feeling extra crazy, chop up some greens.  I used kale, but spinach, mustard greens, collard greens, etc. would all work.


Add optional greens and parmesan cheese.  Give a little taste test and add salt and pepper as needed.


Pour another glass of vino and enjoy.


  • Classic Risotto (Makes 3-4 servings)
  • 4 cups chicken broth
  • 2 TB butter
  • 1 TB olive oil
  • 1 cup finely chopped onions
  • 10 ounces white mushrooms, finely chopped
  • 2 garlic cloves, minced
  • 3/4 cups arborio rice or short-grain white rice
  • 1/3 cup dry white wine
  • 1/2 cup frozen peas, thawed
  • 1/2 cup grated Parmesan
  • Salt and freshly ground black pepper, to taste
  • 1-2 cups kale, chopped (*OPTIONAL)

Bring the broth to a simmer in a heavy medium saucepan. Keep the broth warm over very low heat.
Melt the butter in a heavy large saucepan over medium heat. Add olive oil. Add the onions and saute until tender, about 8 minutes. Add the mushrooms and garlic. Add mushrooms, saute until the mushrooms are tender and the juices evaporate, about 5 minutes. Stir in the rice and let it toast for a few minutes. Add the wine; cook until the liquid is absorbed, stirring often, about 2 minutes. Add 1 cup of hot broth; simmer over medium-low heat until the liquid is absorbed, stirring often, about 3 minutes. Continue to cook until the rice is just tender and the mixture is creamy, adding more broth by cupfuls and stirring often, about 28 minutes. Stir in the peas. Mix in the  parmesan and *greens. Season with salt and pepper, to taste.