Labels

Showing posts with label Vegetarian. Show all posts

Saturday, December 21, 2013

Bar Nuts

The first time I had these cashews, I'm pretty sure I ate the entire container.  They are delicious and slightly addicting.  Luckily, I was able to get the recipe.  They are a fun little gift to make during the holidays.  It's a nice salty break from all of the sweets.  I like to put them in glass jelly jars, because they are quite pretty.


Fresh rosemary is a MUST! And this recipe uses quite a bit.  If you become addicted to these cashews, like I am, you will probably start growing your own rosemary.


I mean look at that goodness... you know you want to whip up a batch of these NOW!  So just do it, you won't be sorry.


Bar Nuts (*adapted from Union Square Cafe Bar Nuts)
4 c. of cashews (1.5 pounds)
1/4 c. chopped fresh rosemary
1 tsp. cayenne pepper
4 tsp. brown sugar
2 tsp. coarse sea salt
2 T melted butter

Roast nuts in a 350* oven for 7-10 minutes, or until golden brown and starting to smell good. (Watch carefully, they will burn in a hurry).  Meanwhile, combine remaining ingredients to make a paste (of sorts).  Pour paste onto hot nuts and toss until every last nut is coated.  Allow to cool completely, then package as desired (or just pour in a pretty bowl and serve at a party).
WARNING: Severely addictive


Thursday, August 15, 2013

One more summer salad- Queso Fresco Corn Salad

I think this will be the last of my installments for Summer Salads.  This one is a little different because it's not a "pasta" salad.  This salad is best the day you make it, unlike my last few recipes.  It's a great recipe to bring to a social event.  You can easily make adjustments depending on the veggies you have on hand.  Use up those garden goodies!


*Queso Fresco Corn Salad*
Cilantro Lime Dressing:
2 TB fresh lime juice
2 TB rice wine/white vinegar
2-3 cloves of garlic
1/4 tsp sea salt
1 tsp honey
1/2 c canola oil
1/4-1/2 c cilantro

Combine lime juice, vinegar, garlic, salt, honey in a blender or food processor.  Add oil in a steady stream until combined. Pulse in cilantro to desired consistency.

Salad:
4 c fresh/frozen corn (I use one 12 oz. bag of yellow and one bag of white, thawed)
8-10 oz queso fresco/cojito, crumbled
1 bell pepper, chopped
1 onion, chopped (I used a sweet onion this time, but often will use a pretty red onion!)
1-2 jalapenos, chopped
1-2 avocados, cubed
Salt & pepper, to taste

Combine all ingredients except avocado, toss in Cilantro lime dressing (above).  Add avocado just prior to serving (to prevent browning).

*Recipe adapted from Our Best Bites

Monday, July 29, 2013

Corn & Feta Pasta Salad with Basil Vinaigrette


Pasta salad is the answer to summer time cooking (or anytime of the year that you don't want to spend time in the kitchen in the evening)!  Make it in the morning (or the day before)  and stay out of the kitchen for the rest of the day!

This recipe uses a very small pasta, like stars, orzo or even Israeli couscous.  There are many other small pastas available, so choose one that's cute, fun or that the kids might like.  The pasta is so small it almost looks like rice, but it's not!

Bring it to a family BBQ, have it for dinner, bring it for lunch, have it as a snack.  Just try it.  You won't be disappointed!

*Corn & Feta Pasta Salad with Basil Vinaigrette*
Cook Pasta:
1.5 c. small pasta (orzo, couscous, little stars, mini bow ties, etc)
  • Cook pasta to al dente, according to package directions. Drain and rinse with cold water until pasta is cooled.
Dressing
3/4 c. fresh basil leaves, finely chopped
1/3 c. olive oil
2 TB red wine vinegar
1 tsp coarse black pepper
1/2 tsp sea salt
  • Combine all ingredients in a small mason jar and shake to combine.
Veggies, etc:
1/2 c.  sweet onion, finely chopped
2 jalapenos, seeded and finely chopped
1 can sweet corn, drained and rinsed OR about 1 cup of fresh corn, cooked
6 oz. feta cheese crumbled.
  • Prepare all veggies and place in a large bowl.  Add cooled pasta and dressing.  Toss to combine. Refrigerate for at least 1 hour.  (This dish can also be served over salad greens.)


*Recipe adapted from Rachael Ray Magazine


Thursday, July 25, 2013

Cilantro Lime Pasta Salad


"Summa time and the livin' is easy"..... unless you don't have central air conditioning.
This summer, we are living in a small apartment with western exposure. We have a small window A/C unit in our bedroom, but the kitchen remains stifling hot.  Cooking dinner (AKA the hottest part of the day) is no bueno when your kitchen is approximately 85-90 degrees.  I am not complaining however, because summer is my favorite time of the year and I embrace (or adapt to)ALL things summer, even hot kitchens.

My adaptation is Pasta Salad.


Pasta salad can be made in the AM when it's nice and cool, and it just gets better as the day passes.  My trick to cooking in the summer is Pasta Salads and Grilling (fish, burgers, chicken, etc).  So I will be sharing a couple of my fav Pasta Salad recipes.  I just finished off the last of this one for lunch.  IT's REALLY GREAT: It's a new twist, it uses up your garden veggies, it's pretty and it's just awesome!


*Cilantro Lime Pasta Salad*
Cook Pasta:
6-8 oz. of dry pasta, about 1/2 of a normal bog/box (I used a combination of rotini and penne)

  • Cook pasta to al dente.  Drain and rinse with cold water until pasta is cool.

Dressing:
1/4 c. fresh lime juice
1/4-1/2 c. fresh cilantro
2 TB olive oil
1 TB honey
1/2 tsp garlic powder
1 tsp cumin
1/4 tsp cayenne pepper

  • While pasta cooks, combine above ingredients in a blender or food processor for 30 seconds.
Veggies, etc:
1 c. cherry tomatoes, halved
1 c. green onions, sliced (could also use a 1/2 c.  of sweet onion here for substitute)
1 mango, peach, nectarine, etc, cut in 1/2 inch pieces (I used a nectarine)
1 avocado, cut in 1/2 inch pieces
2 bell peppers, chopped (Use a variety of colors!)
1 jalapeno pepper, seeded and chopped.


  • Prepare veggies and place in a large bowl.  Add pasta and dressing, toss to combine. Refrigerate for at least 1 hour. ENJOY!


*Recipe adapted from: www.heatovento350.com & www.BHG.com

Wednesday, August 29, 2012

Strawberry Balsamic Dressing

Wow, it's been a whirlwind summer.
I haven't posted since June and for darn good reason!  Here's the latest:
1) Greg and I got married. FINALLY!
2) Greg passed his big test and is now a Journeyman Lineman! YAY!
3) I got a great job at Utah State University. YES!
4) We moved to Logan, Utah. WOW!
5) Greg is working for an awesome crew in Mountain Home, Idaho. $$$$!
6) We rented a house, like a real one, with a foundation.  NO MORE TRAILER TRASH!

All of this happened within a month.  Sometimes life is so crazy, and in my experience, it happens all at once.  When it rains, it pours.  And that's why I haven't been cooking or blogging much.  Oh, and the fact that I lived out of a suitcase the entire summer.  Kind of takes the fun out of cooking.
I seriously doubt that I will be posting much on the ol' blog in the near future,  plus it's no longer the same, because I'm no longer "high class trailer trash!"  What are your thoughts?

 Here's something to keep you happy, until I decide what to do with my blog ...


This is a recipe that I made when strawberries were in their peak.  There's not much better than a fresh, juicy strawberry.  And for those of you who read my blog regularly, you may know that I love to make my own dressing.  This is just a spin on balsamic vinaigrette dressing.


Strawberry Balsamic Dressing

1/4 c. strawberry jam
1/2 c. balsamic vinegar
1/2 c. canola oil
2 tablespoons olive oil
1 tsp. salt
1 tsp. pepper
1/2 tsp. Mrs. Dash
1 tsp dijon mustard

Combine all ingredients in a jar and shake well to combine.  You could also pulse through a blender to get rid of any strawberry chunks, if you are like that!


I loved this dressing on a spinach salad, with goat cheese, peppers and slivered almonds.

Monday, June 25, 2012

Black Bean Tacos

This is a funky, vegetarian taco recipe.  The texture of the bean mixture strongly resembles ground beef, so they are even good for non-vegetarians!
It practically looks like a normal beef taco...how fascinating.  If you are a taco lover like myself, feel free to check out my other taco recipe on the blog: Shrimp Tacos with Lime Cilantro Dressing. I'm still considered a Taco Week on my blog, where I feature a taco-a-day.  YUM!
This recipe is super easy. Check it out.


Measure out spices/seasonings/cornmeal.
Make sure you arrange it in the bowl so it looks pretty.  It makes all the difference..... ;)


Add canned black beans (well rinsed/drained).
Smoosh (yes, this is a word!) with potato smasher... or if you are really fancy and sophisticated, you can put all this in a food processor and pulse until you make a crumbly mixture.


Arrange the mixture in a thin layer on a greased baking sheet, like so:


Bake at 375* for 15-20 minutes, then stir to break up the bean mixture.  Return to oven for 5-10 minutes or until crumbly, brown and slightly crisp.  Remove from oven and continue to stir to break up the beans even more.


Place beans among your favorite taco accompaniments and enjoy.  Also, don't tell your meat eater friends that it's 100% vegetarian and see if they notice.  I love playing the trick your meat-head friend game :)  It's the best.


Black Bean Tacos

1 (14oz) can black beans, drained and rinsed
1/4 cornmeal
1.5 teaspoons chili powder
1 teaspoon cumin
1 tablespoon chili in adobe
1 clove garlic, minced

Preheat oven to 375*. Measure out all seasonings into a large bowl.  Add beans and mash with a potato smasher or fork until you make a crumbly mixture. (You could also pulse in a food processor, if you have one).
Coat a baking sheet with cooking spray and pour mixture on top, spreading into an even layer. Bake 15-20 minutes.  Break up the bean mixture with a spatula and return to oven for 5-10 minutes until brown and crisp.  Remove from oven and continue to break up bean mixture until it resembles ground meat.  Use as taco filling and top with salsa, cheese, sour cream or your other favorite taco toppings.

Monday, June 18, 2012

Balsamic Strawberry Jam

Strawberries are in season, so check out this jam recipe.  It's sweet, tangy and delish!


Rinse some lovely, ripe, sweet berries. Preferably local ones, they are always the sweetest! Take a picture because they are seriously gorgeous.


Dump in a large pot with vinegar (I know it's weird, but it's yummy) and sugar.


Stir and bring to a bubble.  Use a potato smasher to smoosh (Yes, this is a word) the berries or leave them chunky.  Your choice.  Reduce heat and simmer for 30-45 minutes or until jam thickens.  Stir frequently.


Pour into storage container and either freeze or put in the fridge.  This jam is not heavily sweetened, so it may not last as long in the fridge as your usually sugary jams.
Enjoy on pancakes, toast, PB&J's, or stir into plain yogurt or ice cream.  YUMMY.


Strawberry Balsamic Jam

2 pounds strawberries, washed & sliced
5 tablespoons sugar
3 tablespoons balsamic vinegar

Combine all ingredients in a large pot, bring to a bubble over medium heat.  Reduce heat to low and continue to simmer for 30-45 minutes, until jam begins to thicken.  Stir frequently.  Pour into containers and allow to cool.  Store in freezer or fridge.
This is a syrup/jam, by no means is it a jelly.  It would be so yummy on waffles, pancakes, crepes, ice cream, yogurt, and just eaten by the spoonful out of the jar.

Monday, June 11, 2012

Spicy Garbanzo Beans Snackers

I'm currently watching what I eat, AKA trying practice some extra self control on the food situation! Which, it seems like each time I intend to do this, the temptations come in full effect. Ugh.
 See, the thing is, is that I ordered my wedding dress direct from China and it is tini-tiny.  So I am trying to be extra "good" for the 2 months before the big day, so I am able to actually breathe on my wedding day.
All of that nonsense brings me to the recipe today.  These little numbers are oh-so freakin' good and pretty darn healthy for you, too!  Think fiber, b-vitamins, & minerals in the beans, plus a dose of heart heathy fats from the olive oil and a little metabolism boosting cayenne pepper.  A perfect substitute for chips, nuts, and other snack foods.  Wholesome and Mmm-mmm! 

This is super simple.

Drain and rinse a can of garbanzo beans (chick peas) really well.  Pour onto a flat surface and pat dry.


In a medium bowl, combine seasoning & oil well.  Dump the beans into the bowl and toss to coat thoroughly.


Spread beans out on a parchment line baking sheet. Bake for about 20 minutes, then give a good stir and bake an additional 15-20 minutes, or until golden and crispy.  Keep a watchful eye the last few minutes.  Allow to cool completely and snack away.
Feel free to double the recipe if you really start munching on these little numbers.


Spicy Garbanzo Beans Snackers


1 15-ounce can garbanzo beans, drained & rinsed
1 1/2 teaspoons extra-virgin olive oil
1/2 teaspoon paprika
1/4 teaspoon cayenne pepper
1/4 teaspoon cumin
1/2 teaspoon garlic powder
Preheat oven 400*.  Pat the garbanzo beans dry with paper towels.  In a medium bowl, combine spices & oil.  Add garbanzo beans and toss to coat in spice mixture. Pour into even layer on parchment line baking sheet. Bake for 20 minutes; Stir. Replace in oven for 15-20 minutes or until browned and crispy. Keep a watchful eye for the last few minutes, so ensure they don't burn. Cool completely. 
Recipe Adapted from: Our Best Bites


Monday, June 4, 2012

Cucumber Hummus Bites

Do you ever get invited to a BBQ (or something like that) and not know what to bring?  
You want to bring something healthy, but you don't want it to go untouched by guests?  
Maybe you are trying to lose a few and desperately need something at the party that you can eat without overindulging?
Or maybe you simply prefer some healthier items to balance out your typical burger fare?
What ever it may be, these little cucumber appetizer bites are the thing to do.  I'm telling ya, they are the next big thing at your family get-togethers!  
They look like you spent all day making them, when actually it took about 10 minutes.
They are perfect finger food...and who doesn't like finger food?
Look at these Beaut's:


To start, prepare some of my delicious homemade hummus!  Or if you're in a rush, buy some from the super market.  If you haven't made your own before, give it a whirl.  It's easy and you can tweak it to your taste preference. 


Then, Peel an english cucumber like SO:


Slice cucumber into 1-inch rounds.


Spoon hummus into plastic bag and snip off one of the bottom corners for a make-shift pastry bag.


Squeeze hummus through "pastry bag" on top of cuke rounds, sprinkle with sesame seeds (use black sesame seeds for a pretty presentation) and course sea salt.


Serve to your friends for a healthy, pretty and fun appetizer or side dish.  Enjoy!
D

Friday, April 27, 2012

Kale Chips

I'm a serious snacker....and usually when I start, I can't stop.  Since I'm such a compulsive snacker, things like potato chips, cheese, etc. are a BAD idea.  Does anyone else have this problem?  
Well, guess what?  I've found a solution!  KALE CHIPS.  They are pretty much like a baked potato chip, but a kale chip, get it?  You can snack away, without the guilt.
Super easy, super quick, super healthy and surprisingly tasty.

Here's what you need:
1 bunch of kale, washed & torn into large chunks (2"x2"ish)
olive oil
sea salt
cayenne pepper (or another seasoning of your choice, I'm all about the spice!)


Preheat oven 375*. Place kale in large bowl....drizzle with oil....sprinkle with seasoning.  I use my hands to mix it all together...but you could also use a utensil, of course.


Dump the mixture out onto a baking sheet and spread out evenly.  Bake 15-25 minutes or until brown and crispy.  Cooking time may vary.  Just start checking around 15 minutes and continue to peak every few minutes until they look like little crisps!


Remove from oven and allow to cool.  They will get crispier upon cooling.  These are so good, you've got to give them a whirl....even if you don't like kale!


I apologize for the pictures.  This was a really hard thing to photograph and my creative juices weren't flowing very well!
Happy Snacking!
D

Tuesday, March 20, 2012

Sauteed Kale

Greg and I have been on a kale kick, especially Greg.  He requests it.  It seems to be our preferred leafy green these days.  We have it at least a couple times a week.  I like to serve salmon over a bed of sauteed kale, or just as a side dish with anything and everything.  And a bonus, it lasts longer in the fridge than spinach.  
The next part of this post is a trial, I usually talk very little about nutritional components, because I hate preaching, but I'm going to give y'all a little nutrition tidbit on kale.  Let me know what you think.

Kale seems like just another leafy green, but it's actually related to broccoli and other veggies like cabbage and brussel sprouts. I always shoot to include some sort of leafy green in my diet each day because they are such nutrition powerhouses.  

A cup of raw kale has all kinds of goodness in it:
  • 5 grams of fiber
  • 15% DV of calcium & B6
  • 40% DV of magnesium
  • 180% DV of vitamin A
  • 200% DV of vitamin C
  • 1080% DV of vitamin K (Whoa!! Careful if you take blood thinners!)

Wow, eat some kale everyday with a balanced diet and you can throw out that multivitamin!  It's always better to get our nutrients from real food anyways!  
How can it be such an awesome food? 
There has to be a catch right??  
Actually there is.  Kale contains oxalates, which interfere with calcium absorption....BUT this is actually good news because you can.....
SKIP THE MILK AND HAVE WINE!  Ha!  
Here's one of my favorite ways to eat kale (PS: Kale has stronger cholesterol lowering capabilities when it's cooked).


Wash kale thoroughly. Remove the center stem and chop kale.


Saute onion, garlic and red pepper flakes briefly.  Don't let garlic burn.
Add broth, bring to a simmer.


Add kale, cover and allow to simmer until wilted.
I like mine slightly crispy.


I top mine with sea salt, pepper and a little balsamic vinegar!
Enjoy!


Sauteed Kale
Makes about 3-4 servings

2 tsp. olive oil
1/2 cup onion, chopped
2 garlic cloves, minced
1/4 tsp. red pepper flakes
1/2 cup broth (or water)
1 bunch of kale, stem removed & chopped
*sea salt, pepper & balsamic vinegar optional for serving.

Heat oil over medium heat, add onion, garlic, & red pepper flakes.  Before garlic browns, add broth and bring to a simmer.  Add kale; cover and cook until wilted and liquid has cooked out.
*I like mine still slightly crisp and I top it will balsamic vinegar, sea salt and pepper!


Tuesday, February 21, 2012

Hummus

Since I AM a dietitian, I have decided that I must post at least 2 healthy posts to each of my naughty posts.  I was going to share an awesome chocolate chip cookie recipe with you guys, but that will have to wait until later in the week.  Today we are going to make homemade Hummus.
Making your own hummus is SO much more economic and tasty than the pre-made stuff from the store.  Plus, it's free of preservatives because there's no way it's going to last that long once you whip up a batch.
I seriously recommend using a food processor, something that I am not blessed with in the trailer.  As many of you know, I chose to take my blender with me over my food processor because I thought it had more uses.  I wish I had more storage space in here because I would bring my food processor and my Kitchenaide stand mixer.  Oh how I miss those two lovely gadgets in my life.
Ok, so back to the hummus.  Use a food processor if you can, but a blender (mixer or potato smasher) works pretty good.

Start by rinsing those garbanzo beans really, really well until the water runs clear, with no bubbles.  This helps reduce sodium content AND reduces some of those "gases" we associate with beans :)  Both things that most people are trying to reduce in their lives! 


Roughly chop some gaaaarlic. (that's my Boston accent coming through, haah!)


TAHINI, my friends, is the secret to good hummus.  It's pretty much like peanut butter, except it's made out of sesame seeds instead of peanuts.  You usually find it in the grocery store next to the peanut butters.
It's all natural, with no hydrogenated oils, so the oil will settle on the top.  Give it a good stir and store it in the fridge once you open it.
I always store my natural nut butters, Adam's peanut butter & tahini, upside down in the fridge.  That way the oil is on the bottom of the jar and I don't spill it all over when I try to mix it up.  Just another little "trick of the trade"


Combine beans, tahini, seasoning, oil, water and lemon juice in your blender or food processor; pulse until smooth.  You will obtain a much smoother consistency in a food processor.  Add more water if necessary.

Serve with fresh veggies, pita chips, or put on your favorite sandwich or wrap.
Hummus is a great source of protein, fiber, iron, plenty of B-vitamins and minerals.


You could also add a flavor punch to your hummus by adding sun-dried tomatoes, pesto, roasted garlic, etc. etc. etc.
Enjoy this lovely snack, guilt free!

Hummus

1 (14 oz. can) garbanzo beans (AKA chickpeas)
2-3 tablespoons tahini
2 cloves garlic, roughly chopped
2 tablespoons lemon juice
1/4 teaspoon cumin, or more to taste
2 teaspoons olive oil
2-3 tablespoons of water, (or more to achieve desired consistency)
salt to taste

Rinse beans well.  Combine all ingredients in food processor/blender and pulse to combine.  Continue to pulse, adding more water if needed, until desired consistency is achieved.
Garnich with fresh herbs (cilantro, basil, etc).
Serve with veggies, chips or use as a condiment on sandwiches/wraps.
Can be stored in the fridge for about a week.


Wednesday, February 1, 2012

Classic Risotto

Risotto is one of my favorite dishes.  It's so rich and velvety that you would think there was an absurd amount of heavy cream in it....but it's your lucky day, there's no fattening cream in sight.  The thing about risotto is that it needs to be cooked slowly to releases the starches from the rice.  This is where that creamy goodness comes from. Yep, the starch.  
This recipe is the classic version, except for the optional kale that I added at the very end.  I just felt like I wanted some extra greens, since I was having this as my main dinner dish.  Feel free to leave the kale out for an authentic risotto. If you're feeding a big family or want some divine leftovers, double the recipe!


Be sure to use arborio rice (AKA short grain, risotto).  If you don't want to use wine, feel free to simply use more chicken broth.  You probably don't see the normal can or carton of chicken broth in the pic below, because I use something else.  
See that yellow jar with the green lid?  That's Chicken flavored bouillon that you mix with boiling water to make chicken broth.  I use this for 2 reasons: (1) I takes up WAY less space in my tiny trailer pantry and (2) I mix it with WAY more water than it says in order to decrease the sodium content.


Bring your chicken broth to a boil. Once it boils, reduce to a low simmer to keep the broth hot.


While the broth is coming to a boil, prep everything (chop veggies, grate cheese, measure rice, etc).  Chefs call this "mise en place," which means that everything in place and ready to roll.


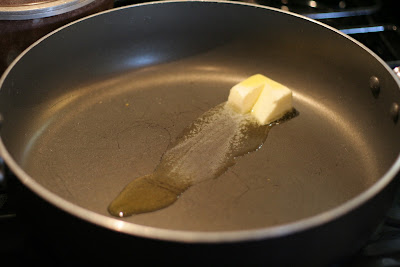
Heat your butter and olive oil in a large skillet over medium heat.  Saute onions until translucent, about 8 minutes.


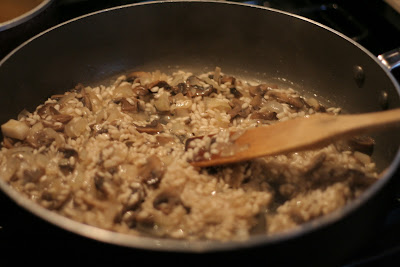
Add mushrooms and garlic.  Cook until mushroom until tender and juice evaporate, about 5 minutes.


Add rice and allow it to toast for a few minutes.


Add the vino and allow it to fully reduce/ absorb in to the rice, about 2 more minutes.


Now dip a measuring cup into your hot broth and add about 1 cup of broth to the pan.  Simmer over medium-low heat until all the liquid is absorbed.  Repeat this process until all of the broth is used up


It's getting close...but not quite that creamy perfection I'm looking for.  Just take your time and allow each cup of broth to absorb, repeat.  Have a glass of wine and relax while the magic happens.


Almost there, it's getting creamy!


Ok, I used up all the broth.  Before the liquid fully absorbs, add peas.


**OPTIONAL If you're feeling extra crazy, chop up some greens.  I used kale, but spinach, mustard greens, collard greens, etc. would all work.


Add optional greens and parmesan cheese.  Give a little taste test and add salt and pepper as needed.


Pour another glass of vino and enjoy.


  • Classic Risotto (Makes 3-4 servings)
  • 4 cups chicken broth
  • 2 TB butter
  • 1 TB olive oil
  • 1 cup finely chopped onions
  • 10 ounces white mushrooms, finely chopped
  • 2 garlic cloves, minced
  • 3/4 cups arborio rice or short-grain white rice
  • 1/3 cup dry white wine
  • 1/2 cup frozen peas, thawed
  • 1/2 cup grated Parmesan
  • Salt and freshly ground black pepper, to taste
  • 1-2 cups kale, chopped (*OPTIONAL)

Bring the broth to a simmer in a heavy medium saucepan. Keep the broth warm over very low heat.
Melt the butter in a heavy large saucepan over medium heat. Add olive oil. Add the onions and saute until tender, about 8 minutes. Add the mushrooms and garlic. Add mushrooms, saute until the mushrooms are tender and the juices evaporate, about 5 minutes. Stir in the rice and let it toast for a few minutes. Add the wine; cook until the liquid is absorbed, stirring often, about 2 minutes. Add 1 cup of hot broth; simmer over medium-low heat until the liquid is absorbed, stirring often, about 3 minutes. Continue to cook until the rice is just tender and the mixture is creamy, adding more broth by cupfuls and stirring often, about 28 minutes. Stir in the peas. Mix in the  parmesan and *greens. Season with salt and pepper, to taste.