Labels

Showing posts with label Main Dish. Show all posts

Sunday, January 12, 2014

Quinoa & Beef Stuffed Baby Peppers


I usually walk right by these baby peppers at the store because I think they are too much work.  For some reason, I grabbed a bag and boy-oh-boy, am I glad that I did.  This recipe is delicious!

I'm pretty sure that I out-did myself on this one.  These Baby Stuffed Peppers turned out AMAZING!
This recipe started out as a way to clean out the fridge and it transformed in to absolute greatness.  Sometimes my culinary abilities shock me.  It's so darn fun.


If you're looking for a vegetarian option, the filling is so delicious that it would still be good without the ground beef.

*I had filling leftover, so I froze it for an easy meal in the future.  The filling would also be good by itself, rolled up in a tortilla, as a based for soup, or even on top of a bed of greens.*

Quinoa & Beef Stuffed MIni Peppers
2# bag of mini bell peppers, seeded & halved
1# ground beef
1 small onion, finely chopped
3 cloves garlic, finely chopped
1.5 T cumin
1.5 T chili powder
1/2 tsp. cayenne pepper

1c. quinoa
2 c. water
1 tsp beef bouillon (I use "Better than Bouillon," it's easy, awesome and no MSG).

1 can black beans, drained/rinsed
1 can corn, drained/rinsed
1 cup salsa
1/2 c. cilantro chopped
1/4 c. light cream cheese, cut into 1" cubes
1/2 c. shredded cheese

1. Bring a pot of water with steam tray in it to a boil. Slice peppers in half (length-wise) and remove seeds.  Steam the peppers for a 3-4 minutes to soften up. Remove and pour onto a towel to drain.

2. Combine quinoa, water and bouillon.  Bring to a boil, reduce heat and cover for 15 minutes or until all water is absorbed.  Remove from heat.

3. Brown the ground beef, draining off any excess drippings.  Add onion, garlic and seasoning, continue to brown until onion is softened and meat is cooked through.  Adjust seasoning, if necessary.

4.  In a large bowl, combine cooked quinoa, beef mixture, beans, corn, salsa, cilantro, cream cheese and shredded cheese.  Stir well until cream cheese melts.

5. Place peppers on a foil lined baking sheet coated with cooking spray.  Spoon mixture onto peppers. I like them over-filled, so I'm very generous with the filling.

6. Bake @ 350* for about 30 minutes. Serve over a shmear (yes this is a word) of refried beans.


Monday, December 30, 2013

Asian Beef with Broccoli

I hereby designate this my blood donor recovery meal.  Iron rich lean beef, vitamin C packed broccoli (more so than an orange!)... all wrapped together in a warm, comforting meal.  Snuggle up and enjoy.


Check out that lovely marbling in my grass-fed beef.  


 Asian Beef with Broccoli*
1 lb flank steak or tenderloin steak, sliced thinly against the grain
3 cups broccoli, cut into bite sized pieces
1 TB cooking oil
Steamed rice 

Beef Marinade
3 tsp soy sauce (or liquid aminos)
2 tsp cornstarch
1 tsp oil
1/4 tsp red pepper flakes

Stir Fry Sauce
2 TB soy sauce
1 TB water
2 tsp rice vinegar (or white vinegar)
2 tsp balsamic vinegar (or Chinese black vinegar)
1 TB minced garlic


1. Combine, marinade ingredients and pour over thinly sliced beef (in a shallow dish). Marinate at least 10-15 minutes (or longer) at room temperature.

2. Steam broccoil for about 3 minutes, until bright green and "crisp yet fork tender." Meanwhile, combine stir fry sauce and set aside.

3. Set the pan over high heat and when hot, add a little oil and swirl to coat.  Add the steak strips, keeping them in one layer and fry 30 seconds. Flip the strips and fry the other side. Add garlic and saute for 15 to 30 seconds, until fragrant.

4. Pour in the Stir-fry Sauce and stir to combine. Simmer until the sauce is thick enough to coat the back of a spoon, about 30 seconds. Add the cooked broccoli back into the pan and toss to coat well.

5. Serve over steamed rice
* Adapted from a Pioneer Woman's recipe

Saturday, September 28, 2013

Mexican Lasagna

I have been a lazy, no-good cook ALL summer long.  I'll be the first to admit it.  I'm sick of not eating homemade food and I'll bet my husband is too.  Thankfully, the craziness of summer is over and we can all look forward to brisk weather that is much more suitable for cooking.

Since I've been so incredibility lazy, I'm going to start back with an easy-peasy recipe, Mexican Lasagna.  This is my go-to for feeding a larger group OR feeding just two, but having plenty of leftovers for the week.

I cannot believe I haven't posted this recipe yet.... (I just had to go double check that I hadn't already posted it). I make it all the time... and for darn good reason --> It's plain tasty and full of nutritious goodness (yes, that's a technical term).

Read on...


Drain and rinse 1 can of black beans and 1 can of sweet corn. Combine with a can of drained/diced tomatoes (You can choose mexican flavored tomatoes for extra flair). These three ingredients appear a lot in my kitchen!


Now start browning up some lean ground meat (beef, turkey, chicken, pork, even TVP, if your vegetarian). Drain off any excess fat, then season with 1.5 tablespoons of chili powder, 2 teaspoons cumin, 1/4 teaspoon cayenne (*optional for those who don't like the heat).  Add in the juice from one fresh lime.  Give it a taste and adjust seasoning if necessary.  I usually end up adding more cumin, because I'm obsessed with cumin.


While the meat is browning combine 16oz. ricotta, 2 eggs, 1/2-1 cup chopped cilantro and 1 cup grated cheese.


When meat is done, combine with the corn-bean-tomato mixture.


Now line the bottom of 2 square 8"greased baking dishes (or one 9x13") with corn tortillas (they act like the noodles in your "Mexican" lasagna!).  If it's just Greg and I, I usually made 2 square pans and freeze one for a quick dinner on another night.


Now begin the layering, top the tortillas with 1/2 the meat/veg mixture, all of the cheese mixture, then tortillas.... add remaining meat/veg mixture and top with plenty of grated cheese.


Bake @ 375* for 35-40 minutes or until heated through and golden on top.  Apparently, I was either very hungry or being a major airhead the night I made this, because I didn't take a picture of the finished product.... but use your imagination, it's pure awesomeness!

Mexican Lasagna
1# ground meat
1.5 T chili powder
2 tsp cumin 
1/4 tsp cayenne
juice from one lime
1 can black beans, rinsed and drained
1 can corn, rinsed and drained
1 large (28oz) can tomatoes, drained
1# ricotta cheese
2 eggs
1/2 to 1 cup cilantro, chopped
2-3 cups shredded cheese
12-16 corn tortillas

Preheat oven to 375*,  grease either a 9x13 OR two 8" square baking dishes (you can either make one large lasagna, or 2 small ones, for freezing or sharing with a neighbor). 
Brown meat, discard drippings. Season meat (including a squeeze of lime), adjust if necessary.  Combine meat with corn, beans and tomatoes.
Combine ricotta, eggs, cilantro, 1c shredded cheese. Line bottom of greased pan with corn tortillas, top the tortillas with 1/2 the meat/veg mixture, all of the cheese mixture, then tortillas.... add remaining meat/veg mixture and top with plenty of grated cheese.
Bake 35-40 minutes or until heat through and golden on top.

Enjoy!

Monday, June 25, 2012

Black Bean Tacos

This is a funky, vegetarian taco recipe.  The texture of the bean mixture strongly resembles ground beef, so they are even good for non-vegetarians!
It practically looks like a normal beef taco...how fascinating.  If you are a taco lover like myself, feel free to check out my other taco recipe on the blog: Shrimp Tacos with Lime Cilantro Dressing. I'm still considered a Taco Week on my blog, where I feature a taco-a-day.  YUM!
This recipe is super easy. Check it out.


Measure out spices/seasonings/cornmeal.
Make sure you arrange it in the bowl so it looks pretty.  It makes all the difference..... ;)


Add canned black beans (well rinsed/drained).
Smoosh (yes, this is a word!) with potato smasher... or if you are really fancy and sophisticated, you can put all this in a food processor and pulse until you make a crumbly mixture.


Arrange the mixture in a thin layer on a greased baking sheet, like so:


Bake at 375* for 15-20 minutes, then stir to break up the bean mixture.  Return to oven for 5-10 minutes or until crumbly, brown and slightly crisp.  Remove from oven and continue to stir to break up the beans even more.


Place beans among your favorite taco accompaniments and enjoy.  Also, don't tell your meat eater friends that it's 100% vegetarian and see if they notice.  I love playing the trick your meat-head friend game :)  It's the best.


Black Bean Tacos

1 (14oz) can black beans, drained and rinsed
1/4 cornmeal
1.5 teaspoons chili powder
1 teaspoon cumin
1 tablespoon chili in adobe
1 clove garlic, minced

Preheat oven to 375*. Measure out all seasonings into a large bowl.  Add beans and mash with a potato smasher or fork until you make a crumbly mixture. (You could also pulse in a food processor, if you have one).
Coat a baking sheet with cooking spray and pour mixture on top, spreading into an even layer. Bake 15-20 minutes.  Break up the bean mixture with a spatula and return to oven for 5-10 minutes until brown and crisp.  Remove from oven and continue to break up bean mixture until it resembles ground meat.  Use as taco filling and top with salsa, cheese, sour cream or your other favorite taco toppings.

Thursday, May 31, 2012

Sticky Sweet Drummies

Memorial Day is the unofficial kickoff to summer.  A special thank you to those who have given their lives.  It doesn't go unappreciated!  It's because of The Brave that we are able to celebrate the way we do. 
Summer means many things, but for many of us...it means grill time.  I love the grill for many reasons:
It's requires few dishes.
It's taste cannot be surpassed.
It's done outside.
It's fast.
It's a rush each time you hold a match to light the bugger. (my arm hair has grown back since last summer!)
It smells delicious! 

There are many more reasons to grill, but those were the ones that popped to my head today.  Why do you like to grill?

Have I ever mentioned that Summer is my favorite time of the year?  I love the heat, the sun, swimming, grilling, EVERYTHING that has to do with summer. I could easily live somewhere with 2 seasons: hot and warm.  Is anyone else with me on this?

Although today's recipe requires some indoor action as well, the resulting glaze is well worth it.  Are you drooling yet over these lovely drummies below?


It's pretty simple, read the recipe below. 
Prepare the marinade/glaze.


Pour over chicken.
Refrigerate and marinate.


Reserve marinade and grill drummies.
Simmer reserved marinade for 15 minutes until thick and gooey.
Glaze the grilled drummies with sweet and sticky goodness.


Grab a roll of paper towels and enjoy.
Wash down with an ice cold beer and tell a story.


Sticky Sweet Drummies*


1/4 cup honey


1/4 cup balsamic vinegar


1/4 cup brown sugar, packed


2 tablespoons soy sauce


1/4 tsp. dried rosemary 


5 garlic cloves, halved


6-8 chicken drumsticks


2 tablespoons toasted sesame seeds

3 tablespoons green onions, chopped


Instructions:
Combine honey, vinegar, sugar, soy sauce, rosemary, & garlic.  Stir until sugar dissolves.  Place drumsticks in a baking dish and pour marinade over the top.  Swirl around each drummie so it's coated in marinade.  Allow to marinate at least 15 minutes, then flip and marinate another 15 minutes, longer is better.


When it's time to cook, fire up the grill. Remove chicken from marinade and reserve the marinade.  Pour reserved marinade into a small saucepan and bring to a boil.  Reduce heat and simmer for about 15 minutes until marinade reduces down into a thickened glaze.
Grill drummies until cooked thoroughly.
Drizzle glaze over the top of cooked drummies.  Sprinkle with sesame seeds and green onions (if you have them...I didn't)


*Recipe adapted from Giada DeLaurentis "Sweet & Sticky Chicken Drumsticks"

Thursday, May 3, 2012

Shrimp Tacos with Cilantro Lime Dressing

I seriously love tacos.  They are such a cool meal; one of my favorites.  For starters, they are SO easy to make...just chop some veggies & cilantro, grate some cheese, cook up some filler (meat, fish, beans) and wrap it up in your tortilla of choice.  They are also very pretty and fun to photograph.  And of course, they are so darn tasty and everyone likes them!


I have many versions of tacos that I make: good ol' beef, shredded chicken/pork, shrimp, black bean, and fish.  Maybe I'll have a taco week on the blog sometime!
Here's a couple of my secrets to amaaaaa-zing tacos:
1) You must warm up the shells.  I prefer corn tortillas, but flour is good, too.  The easiest way to warm them up is to wrap a stack in a damp dishcloth and nuke them for 1-2 minutes. (Thanks KayCee for this trick!)
2) If you are a corn tortilla lover, like myself, you must double up the shells!  If you choose not to, your taco will end up on the front of your shirt or in your lap.
3. You must have fresh fixins'... think, pico de gallo, cilantro, a squeeze of lime, tomatoes, onions, etc.
4. You must season appropriately!! And I don't mean that salty "taco seasoning."  That stuff is icky.  I usually use chili powder, cumin(one of my fav spices), cayenne and a smashed up chili in adobo sauce. But for this recipe, I make a special dressing that you cook the shrimp in.  It's good drizzled over the top, or as dressing for a taco salad.  It's a knock off from the Nordstrom Cafe Cilantro Lime Salad.  YUM!
5.  And lastly, you must overfill your taco shell so it's practically impossible to roll up!  Greg and I do this every time, he's worse than me though.  It makes a gloriously delicious mess.


Cilantro Lime Dressing

1/3 cup seasoned rice wine vinegar
1/4 cup fresh lime juice
1 clove garlic, minced
1 teaspoon pureed chipotle chiles in adobo sauce
2 tablespoons honey
1/2 teaspoon kosher salt
1/2 cup canola oil
1 cup chopped fresh cilantro stems and leaves

1 pound raw shrimp, peeled and rinsed well

Combine all the ingredients in a blender and pulse to combine.  Place shrimp in a shallow dish and pour 1/2 the dressing over the top.  Reserve the remaining dressing to drizzle on the tacos.  Allow to marinate for at least 15 minutes.
Heat a little oil in a frying pan over medium heat; add shrimp (dressing and all) and saute about 5 minutes or just until shrimp is pink throughout.  Shrimp cooks very quickly, so please don't overcook, as they like to get tough and chewy!!
Warm the taco shells and enjoy!

D

Tuesday, May 1, 2012

Chicken Marsala Skillet

You know chicken marsala?  You know one pot meals?  Well they just got married, made a healthy baby and it's name is Chicken Marsala Skillet.  And I have one word for it, YUM.
I love one-pot meals, not only because there's less dishes to do, but I love how the flavors build on each other.  
You guys are going to love this!  


Cook pasta according to directions, drain.  Reserve pasta water (for later)!
Heat some oil (1-2 Tablespoons) in a large skillet, season chicken with salt/pepper, then brown it thoroughly.  The secret to browning it well, is stirring as little as possible!  Don't disturb the chicken!!  Once it's brown and cooked through, remove from pan and set aside. 
Be sure to leave all the pan drippings in the pan, they provide lots of flavor.


Over medium heat, melt butter in the same pan, then add onions, mushrooms and garlic.  Saute for about a minute, making sure the garlic doesn't burn.


Add marsala wine and broth, stirring to deglaze the pan.
(You could always use another white wine if that's all you have on hand, but it would no longer be chicken marsala! You could also use all broth, if you insist, but that's really no fun.)


Bring this goodness to a steady bubble, and continue to simmer until liquid is reduced by about half.


Once your liquid is reduced, turn off the heat, add tomatoes, spinach, & goat cheese.....plus a good sprinkle of salt/pepper.  Give it a good stir, until the spinach begins to wilt.
I think cherry tomatoes may be my favorite subject to photograph....


Then dump the drained pasta on top and toss together.
If it gets too dry, add a little of the reserved pasta water until your reach your desired consistency.  The amount you use will depend on how much you reduced the liquids.  I had to add very little, maybe 1/4 cup, or less.


Serve with grated parmesan on top!  Savor a little bit of heaven in this dish.  And be sure to wash down with a hefty glass of vino rosso.  Cheers.


Chicken Marsala Skillet

1 pound whole grain penne pasta (1 box)
2-4 chicken breasts (depending on how much meat you prefer), cut into 1 inch chunks
1-2 TB oil
1-2 TB butter
3 cloves garlic, minced
1/2 c. sweet onion, finely chopped
8 oz. crimini mushrooms, sliced or quartered
1 cup marsala cooking wine
1 cup chicken broth
1 bag spinach
2 cups cherry tomatoes, halved
1/4 cup goat cheese
Salt & Pepper
Parmesan for grating

Instructions:
Cook pasta according to directions, drain.  Reserve pasta water.
Heat oil in a large skillet, season chicken with salt/pepper, then brown it thoroughly (stirring as little as possible).  Once it's brown and cooked through, remove chicken from pan and set aside.  
In the same pan, over medium heat, melt butter, then add onions, mushrooms and garlic.  Saute for about a minute, making sure the garlic doesn't burn.
Add marsala wine and broth, stirring to deglaze the pan. Bring to a steady bubble, and continue to simmer until liquid is reduced by half.
Once liquid is reduced, turn off heat, add tomatoes, spinach, & goat cheese. Season with salt/pepper.  Stir until spinach begins to wilt.
Add the drained pasta on top and toss together.
If it gets too dry, add a little of the reserved pasta water until your reach your desired consistency.  Serve with grated parmesan on top.  Enjoy.


Tuesday, April 24, 2012

Easy Baked Mexi-Chicken

So last week, I was on a major Mexican Food kick.  I made Mexican food 4 out of 5 nights.  
Here's a few reasons why I like Mexican Food:
1. It's spicy.  I LOVE THE HEAT!
2. It's fresh....the way I cook it anyways. Full of vegetables, lime and cilantro.
3. I LOVE cumin.  It's become one of my favorite spices.
4. I LOVE cilantro.  It's such a versatile herb, with many uses.  Not too overpowering.
5. I LOVE beans.
6. I LOVE cheese.
7. It's fun to roll things up in a tortilla
8. Tacos are the coolest meal, you can make them a ba-zillion ways.
9. It's easy to make vegetarian.
10. It's plain easy to prepare.

Today's recipe combines many of my favorite things about Mexican foods.  I got the idea of this recipe from my dear friend, Leslie, back when I was in High School and I dated her sweet son.  It was originally a Weight Watchers recipe, but I spiced it up a bit.  It's so easy, you're going to love it!

The following recipe serves 2-3.  There's really no specific recipe, so play with it until you find personal perfection.

Here's what you need:
Chicken breasts
Refried Beans
Cumin
Chili Powder
Cayenne
Salsa
*Optional: Cilantro, Avocado, Lime, Sour Cream

Preheat oven to 350*
Line an 8x8 baking dish with aluminum foil (for easy clean up).  
Open a can of refried bean and spread the beans in your foil lined baking dish.
Place 2-3 chicken breasts on top of the beans.
Sprinkle with cumin, chili powder, and cayenne.  Feel free to leave out the cayenne if you aren't nuts about spicy food.


Bake at 350* for 30 minutes or until chicken is cooked through or has internal temp of 160*. 
Remove from oven and allow to cool 5 minutes.


To serve, scoop up plenty of beans and plate, top with the chicken.  Top with salsa, avocado, cilantro and a squeeze of lime.....or whatever floats your boat!
Serve with a pile of greens on top for a Mexican Salad
OR
Serve with Spanish Brown Rice.


If you're feeling extra saucy, enjoy with an ice cold Corona.
Salute!

Monday, April 16, 2012

Sexy Beef Stew

To go along with my third installment of "Diary of a Naughty Dietitian," I'm going to post a stellar, delectable, scrumptious and sexy beef dish.  I call this dish sexy because it is rich and satisfying!  Haha!!

I started with some "stew meat" which is basically chunks of not-so-tender/ultra lean beef.  This comes from cuts like chuck, round, shank, which are from heavily exercised parts of the animal, therefore they are lean and tougher.  Now if you want a nice, tender steak....this is NOT the cut you want, but if you want to slow cook a piece of meat to perfection, this is the perfect cut!!  Here's a simple diagram of beef cuts to give you an idea of where the cuts come from.


Ok, on to the stew.  This is the most amazing stew I've ever made or tasted.  It's truly a treat.


I'm convinced that it's a combination of wine and tomato paste that make it so special.  Check it out.


Sexy Beef Stew

1 pound Stew Meat, cut into 2 inch cubes
1 small can tomato paste
1-14oz can diced tomatoes
1 cup water
1 cup broth (any you have on hand)
1 cup dry red wine
1 cup onion, diced
3 carrots, sliced
2 cloves garlic, minced
1 tsp. olive oil
1 tsp sea salt
1 tsp. Italian seasoning
1 tsp. Mrs. Dash
1/2 tsp. cracked pepper

1/2 cup barley
1/2 cup frozen peas.
*Optional balsamic vinegar

Combine all ingredients except barley/peas in a large crockpot.  Cook on low for 7-9 hours.  During the last 1-2 hours of cooking, add the barley and peas; continue to cook until barley is tender.  Serve with a splash of balsamic vinegar for a little kick.  Enjoy with a heavy, dry red wine.
 YUM!

Wednesday, February 1, 2012

Classic Risotto

Risotto is one of my favorite dishes.  It's so rich and velvety that you would think there was an absurd amount of heavy cream in it....but it's your lucky day, there's no fattening cream in sight.  The thing about risotto is that it needs to be cooked slowly to releases the starches from the rice.  This is where that creamy goodness comes from. Yep, the starch.  
This recipe is the classic version, except for the optional kale that I added at the very end.  I just felt like I wanted some extra greens, since I was having this as my main dinner dish.  Feel free to leave the kale out for an authentic risotto. If you're feeding a big family or want some divine leftovers, double the recipe!


Be sure to use arborio rice (AKA short grain, risotto).  If you don't want to use wine, feel free to simply use more chicken broth.  You probably don't see the normal can or carton of chicken broth in the pic below, because I use something else.  
See that yellow jar with the green lid?  That's Chicken flavored bouillon that you mix with boiling water to make chicken broth.  I use this for 2 reasons: (1) I takes up WAY less space in my tiny trailer pantry and (2) I mix it with WAY more water than it says in order to decrease the sodium content.


Bring your chicken broth to a boil. Once it boils, reduce to a low simmer to keep the broth hot.


While the broth is coming to a boil, prep everything (chop veggies, grate cheese, measure rice, etc).  Chefs call this "mise en place," which means that everything in place and ready to roll.


Heat your butter and olive oil in a large skillet over medium heat.  Saute onions until translucent, about 8 minutes.


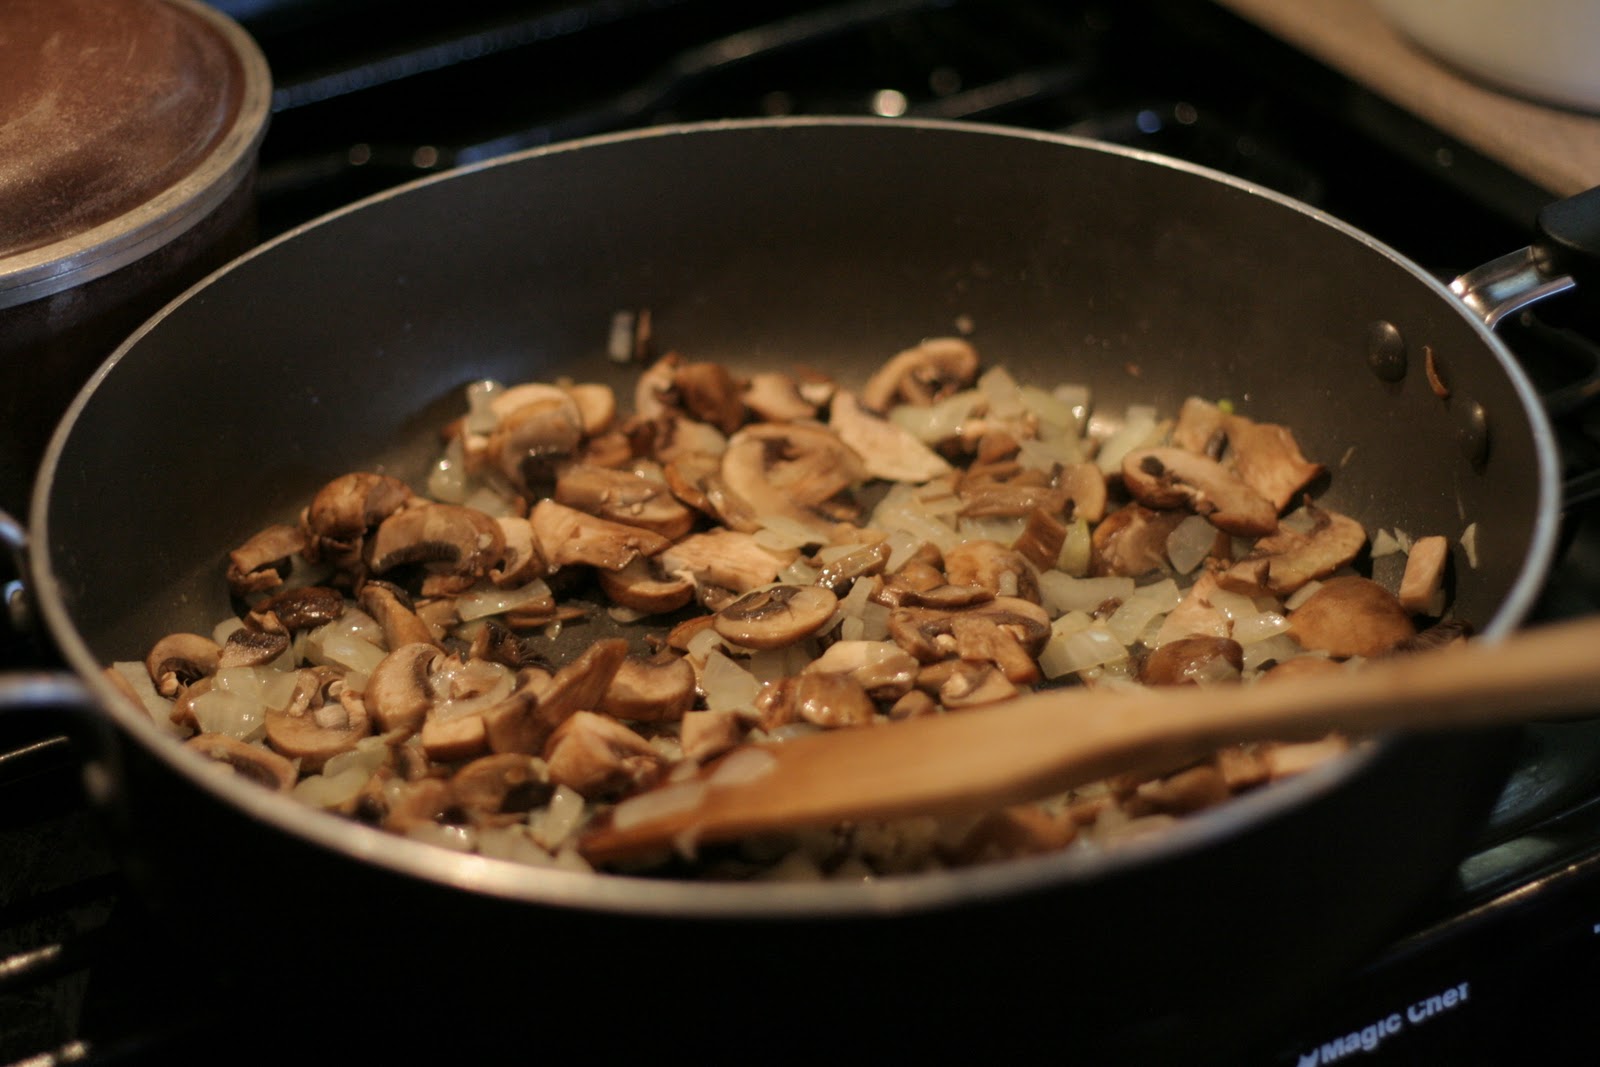
Add mushrooms and garlic.  Cook until mushroom until tender and juice evaporate, about 5 minutes.


Add rice and allow it to toast for a few minutes.


Add the vino and allow it to fully reduce/ absorb in to the rice, about 2 more minutes.


Now dip a measuring cup into your hot broth and add about 1 cup of broth to the pan.  Simmer over medium-low heat until all the liquid is absorbed.  Repeat this process until all of the broth is used up


It's getting close...but not quite that creamy perfection I'm looking for.  Just take your time and allow each cup of broth to absorb, repeat.  Have a glass of wine and relax while the magic happens.


Almost there, it's getting creamy!


Ok, I used up all the broth.  Before the liquid fully absorbs, add peas.


**OPTIONAL If you're feeling extra crazy, chop up some greens.  I used kale, but spinach, mustard greens, collard greens, etc. would all work.


Add optional greens and parmesan cheese.  Give a little taste test and add salt and pepper as needed.


Pour another glass of vino and enjoy.


  • Classic Risotto (Makes 3-4 servings)
  • 4 cups chicken broth
  • 2 TB butter
  • 1 TB olive oil
  • 1 cup finely chopped onions
  • 10 ounces white mushrooms, finely chopped
  • 2 garlic cloves, minced
  • 3/4 cups arborio rice or short-grain white rice
  • 1/3 cup dry white wine
  • 1/2 cup frozen peas, thawed
  • 1/2 cup grated Parmesan
  • Salt and freshly ground black pepper, to taste
  • 1-2 cups kale, chopped (*OPTIONAL)

Bring the broth to a simmer in a heavy medium saucepan. Keep the broth warm over very low heat.
Melt the butter in a heavy large saucepan over medium heat. Add olive oil. Add the onions and saute until tender, about 8 minutes. Add the mushrooms and garlic. Add mushrooms, saute until the mushrooms are tender and the juices evaporate, about 5 minutes. Stir in the rice and let it toast for a few minutes. Add the wine; cook until the liquid is absorbed, stirring often, about 2 minutes. Add 1 cup of hot broth; simmer over medium-low heat until the liquid is absorbed, stirring often, about 3 minutes. Continue to cook until the rice is just tender and the mixture is creamy, adding more broth by cupfuls and stirring often, about 28 minutes. Stir in the peas. Mix in the  parmesan and *greens. Season with salt and pepper, to taste.